Build a REAL House Getting Started Guide
Your first dig-to-tiles loop — tools, notebook, handprint, and when upgrades actually help.
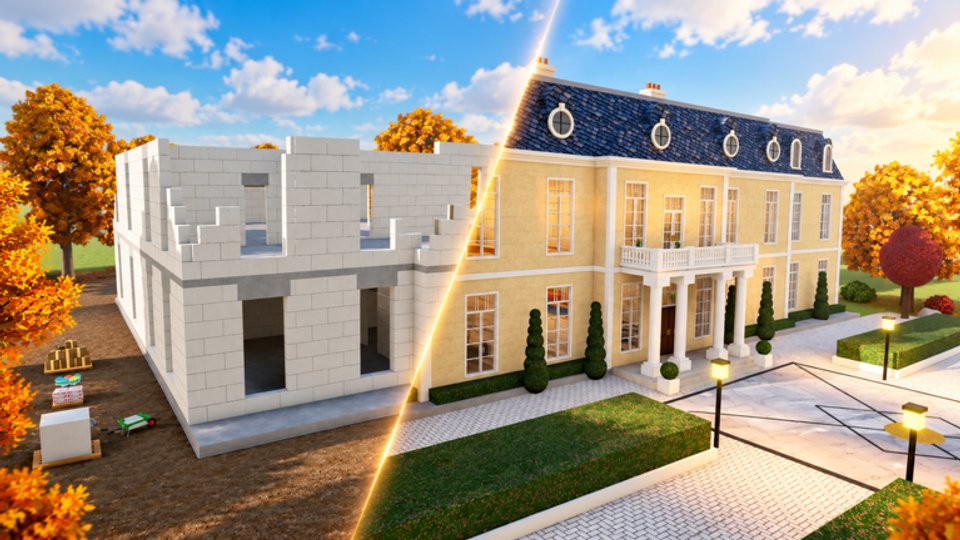
Build a REAL House is a Roblox construction sim by airplnae, released 21 October 2026. You build real houses stage by stage — dig the pit, pour concrete, stack walls, add the roof, plaster, paint, and finish with tiles — solo or with friends. This guide covers your first session from joining the place to completing the starter House without wasting gems or mastery XP.
Play the experience here: Build a REAL House on Roblox.
Before you dig
Spawn in and take ten seconds to orient. Note where the build site sits, where tools appear, and how the UI points you at the current stage. You do not need every house unlocked on day one. The design assumes you learn the full loop on House, then carry that muscle memory into Pool, Villa, Mansion, Riviera Villa, Sunset, and Estate.
If promo codes are live, claim them first on the Codes page so early gem or cash boosts land before you spend. Then open this wiki’s Controls cheat sheet and keep it handy until Click/hold, F, Tab, and E feel automatic.
Core controls in one minute
- Click / hold — use the equipped tool (dig, pour, stack, finish).
- F — inspect / show off the current tool (great for checking mastery flair).
- Tab — open the notebook for upgrades and progress.
- E — leave your handprint in wet concrete when the stage allows it.
Mobile players get on-screen buttons for the same actions; hold still matters on touch because short taps can waste tool swings. Full device notes live on Controls.
First goal: finish House once, cleanly
Do not chase leaderboards or Rainbow tools in the first hour. Chase a clean completion of the starter House.
- Dig the pit — clear the footprint fully. Uneven or half-dug pits make every later stage awkward. While digging, watch for treasures; they feed the gem economy covered in Treasures & Gems.
- Pour concrete — fill the prepared pit and let the pour read as complete before you rush walls. When the concrete is wet, press E for the handprint easter-egg moment — it does not replace finishing the stage, but it is part of the fantasy.
- Stack walls — follow the marked layout. Corners and openings matter more than speed on your first run.
- Roof — close the structure before finishing work. A missing roof section usually blocks or soft-locks polish stages.
- Plaster → paint → tiles — treat these as three separate finish passes. Plaster levels surfaces, paint covers them, tiles complete the look. Skipping order creates redo work.
The deep stage breakdown sits in How to Build. Use that page the moment a stage feels unclear; this getting-started page is about pacing and habits.
Meet your tools and the notebook
Every satisfying swing feeds Tool Mastery: Bronze → Silver → Gold → Diamond → Rainbow. Early on, simply using the right tool for the stage is enough XP. Press F occasionally so you can see which tool you are holding and enjoy the inspect animation — it also helps you notice when an upgrade changed the look.
Press Tab often. The notebook is where upgrades live. After your first House, open it and ask two questions:
- Which tool slowed me down the most (dig, pour, wall, finish)?
- Do I have gems or currency to fix that bottleneck?
Upgrade the bottleneck first. Cosmetics and flex tiers can wait. Ranked upgrade advice is on the Tools Tier List and the full mastery track is in Tool Mastery.
When to upgrade (first-session rule)
Upgrade when a tool clearly gates the next house size — not because a shiny tier appeared. Practical first-session rule:
- Finish House with starter tools if you can.
- Spend early gems on the dig or pour tool if the pit or foundation ate most of your time.
- Hold big spends until you have sampled Pool or Villa and know which stage still hurts.
Gems come from dug treasures and other sinks described in Treasures & Gems. Do not ignore dig loot just because you are “focused on building”; pit work is both foundation and economy.
Co-op on day one?
Co-op is supported and fun, but your first House should ideally be solo or with one patient friend who lets you touch every stage. Once you understand the order, read Co-op and split dig / pour / walls / finish so races make sense. Blind co-op where everyone digs the same hole teaches less and finishes slower.
After House: what to unlock next
- Re-open How to Build and note which stage you want to shave time from.
- Skim Houses Walkthrough so Pool and Villa do not surprise you with scale.
- Check Tool Mastery and the Tools Tier List before a gem dump.
- When you care about time, move to Speed Building.
First-session checklist
- Joined the official place and claimed any Codes.
- Memorized Click/hold, F, Tab, E.
- Dug a full pit and watched for treasures.
- Poured concrete and tried the handprint (E).
- Completed walls, roof, plaster, paint, and tiles on House.
- Opened the notebook (Tab) and planned one smart upgrade.
- Bookmarked Controls, How to Build, and Tool Mastery for session two.
If you only remember three things: finish the full dig→tiles loop once, upgrade bottlenecks not vanity, and use the notebook every session. Everything else on this wiki builds on that foundation.
Frequently Asked Questions
Quick answers to the most common questions.
What is the first house I should build?
The starter House. Learn the full dig → concrete → walls → roof → plaster → paint → tiles loop before larger projects.
How do I open upgrades?
Press Tab to open the notebook. Spend gems and progress on tools that slowed your last build.
What does the handprint do?
Press E while concrete is wet to leave your handprint. It is a signature moment — still finish the pour stage properly.
Should I upgrade tools before finishing House?
Only if a tool hard-blocks you. Otherwise finish House once, then upgrade the stage that took longest.